
So, I've extracted promises from my victims - er, relatives - that they won't hit my websites until after the festivities tomorrow morning. Or this morning, actually, as it just rolled over to midnight. In any event, it's time once again to post my usually cruddy pictures of this year's usual cruddy ornaments.
The Process Begins
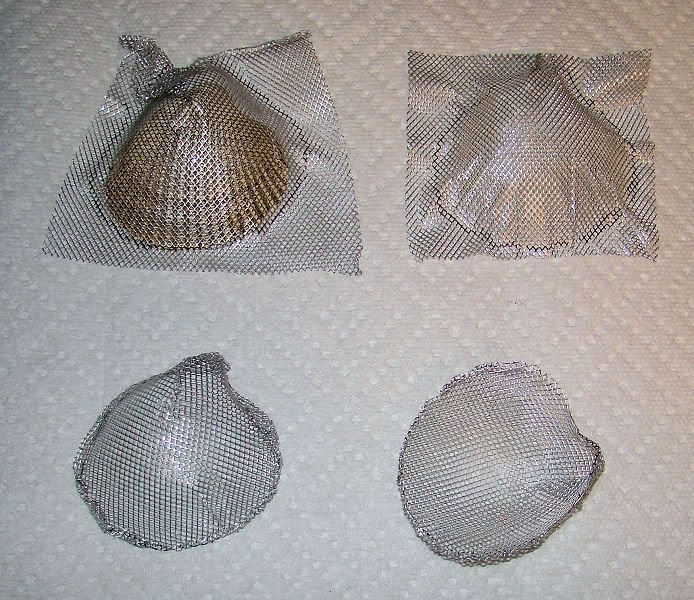
This year, most of my family took a trip to the ocean with Grandpa. It was likely his last vacation. In honor of the event, I decided to do ocean-themed ornaments. And what's more oceanic than a seashell? I used a real shell, and formed Activ-Wire mesh around it. (If I'd known how well the stuff worked, I would've used it in another project... but that's in the Bonus section.)
The Process Continues
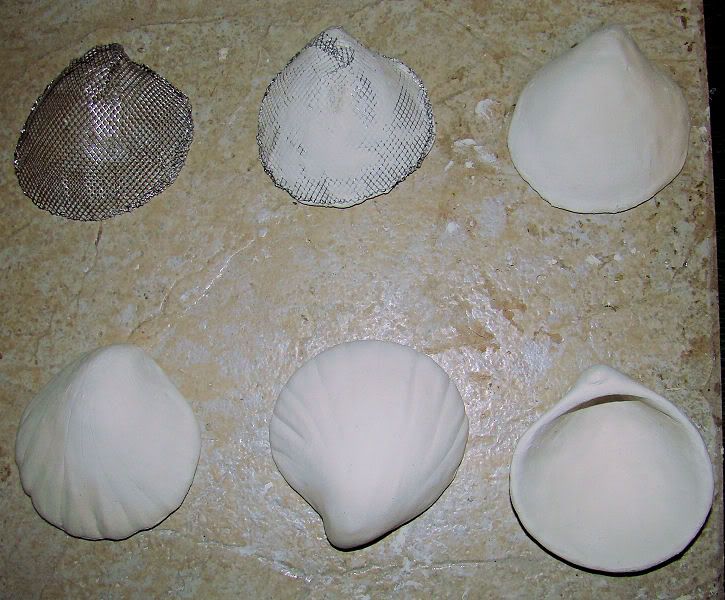
Once the wire was formed into a shell-like shape, I pressed Paperclay onto it and formed the shell I'd be working with. Inside first, then outside. It went surprisingly well, considering my usual luck.
The "Other" Projects
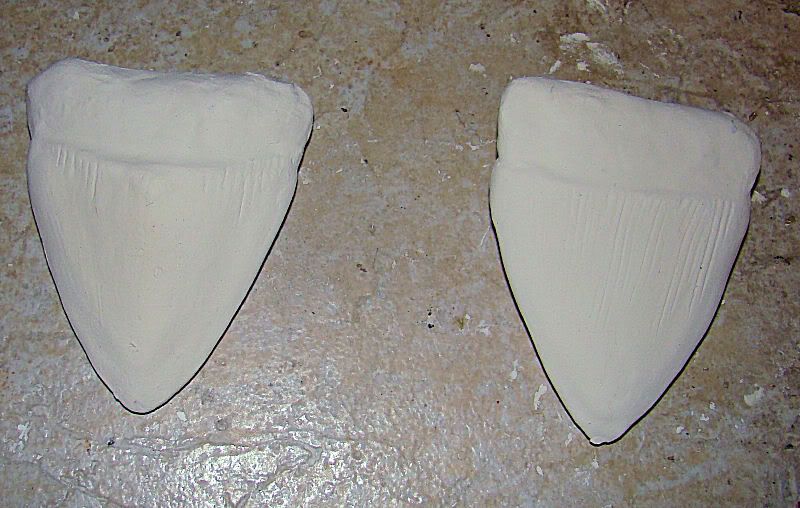
About midway through the process, my aunt had some dental issues involving a front tooth. All she wanted for Xmas, she declared, was her front tooth... with much repetition of the very similar song. Well, her wish was my command... provided her husband loans her his ornament. And provided she doesn't mind shark teeth. I drew a template of paper, cut Activ-Wire for the shape, built it up with aluminum foil, and wrapped it with florist's tape (so the Paperclay would adhere better.)
The Teeth Continued
How they built up. I hadn't done the tops yet; I was going for a Megalodon/fossil tooth look, and wound up using a hairbrush for the rough texturing... more visible in the next images.
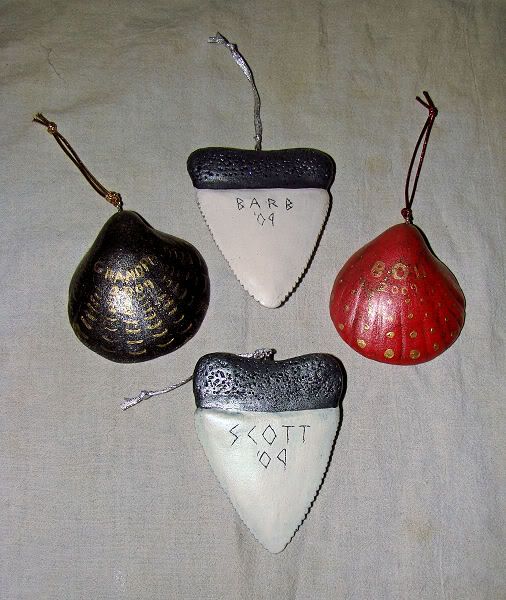
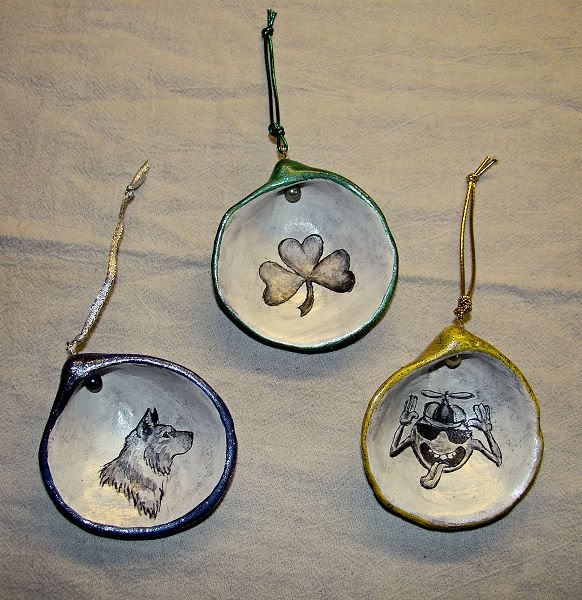
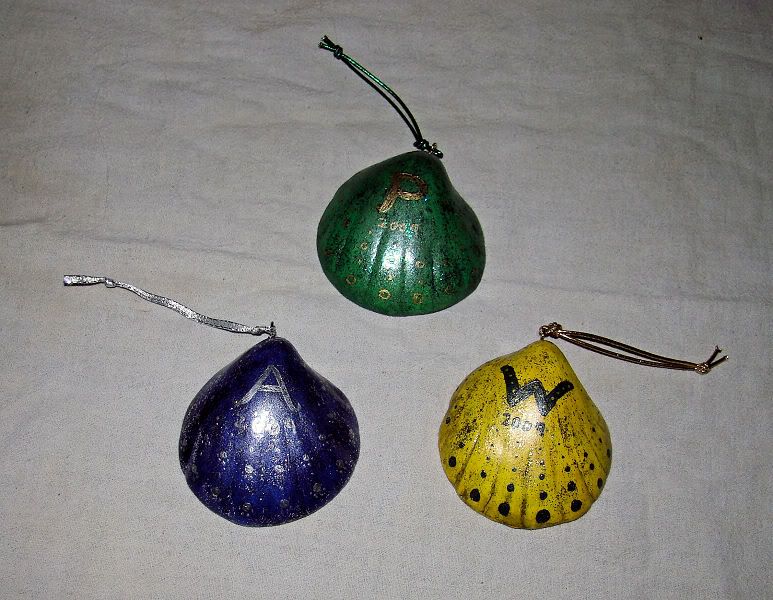
The Final Products Front and Back (immediate family: front and back)
Okay, so I skipped a step or two. I started doing scrimshaw on the shells: I traced pictures onto the insides and scratched the outlines with dental tools, then did an antiquing rubdown to mark the lines. Unfortunately, the results looked... well, "horrific" springs to mind. It was my first attempt at scrimshaw on Paperclay, so I suppose it was bound to come out looking terrible. To salvage them, I wound up doing a wash/shade look. Then I painted the backs, hit them with glitter glaze and a coat of spray-on pearl coat, and glued pearls in the tops. The shark's teeth got a similar treatment, except I kept the tops fairly neutral (save a hint of dark glitter for sparkle.) A final topcoat of satin finish to seal them, on with the hangers, and done in time for Xmas Eve. Well, the evening part of Xmas Eve, at least...
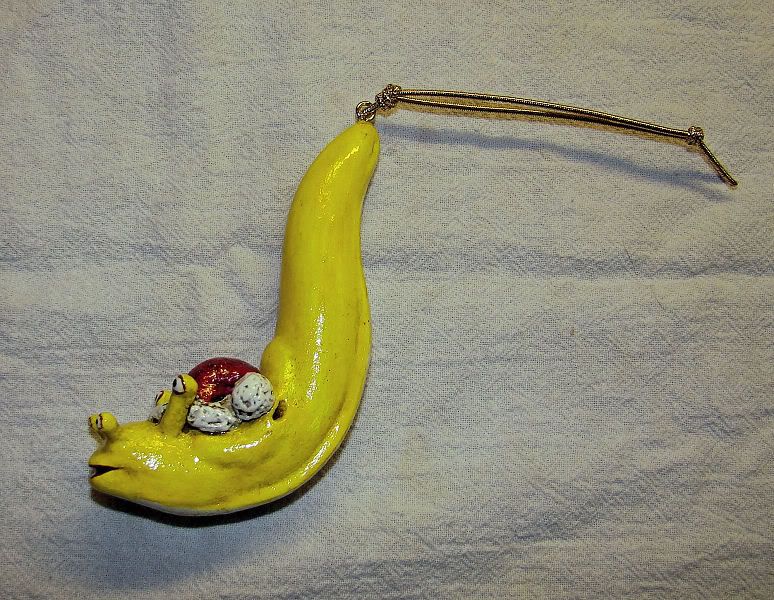
The Banana Slug: Side Shots
More views of this year's personal project. Well, he amused me, at least...
The Bonus: Operation
Since I have confirmation of receipt by the vict- er, person who requested them, I thought I'd post the start-to-finish chronicle of the making of this year's most ambitious project. What started as a request to add to an existing ensemble resulted in a complete remake.
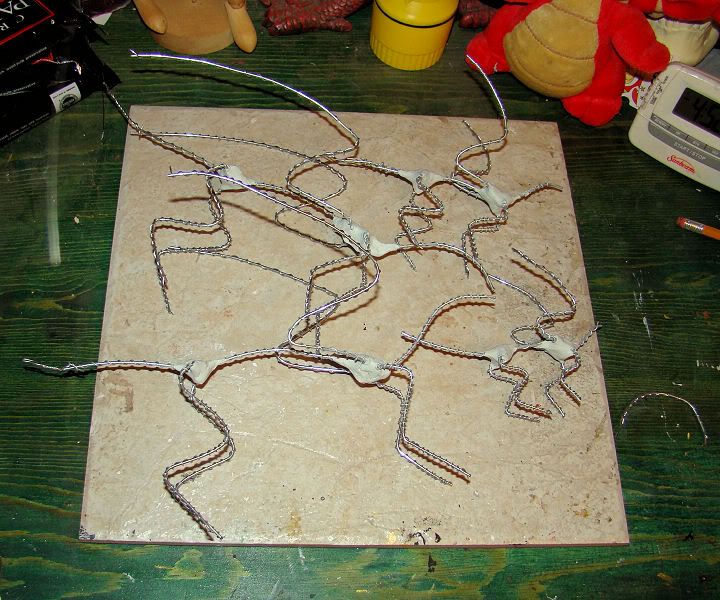
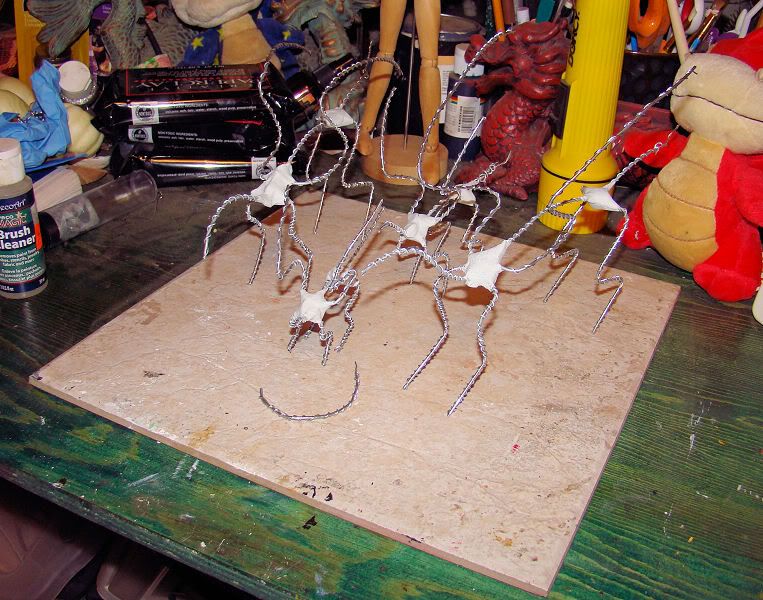
In the Beginning, there was Wire...
I started, as usual, with no clue what I was going to do, but with a nice wire frame with which to do it. Having lurked on an art board for some time, I figured I'd try some of their techniques, namely wrapping the wire (for a better grip) and using epoxy to hold together the armatures. And, as the second image proves, these armatures were completely freestanding! (A personal victory, if of little to no import to anyone else.) Yes, those counting may note only four armatures: the littlest one was fighting me, and currently is little more than a wrapped wire spine.
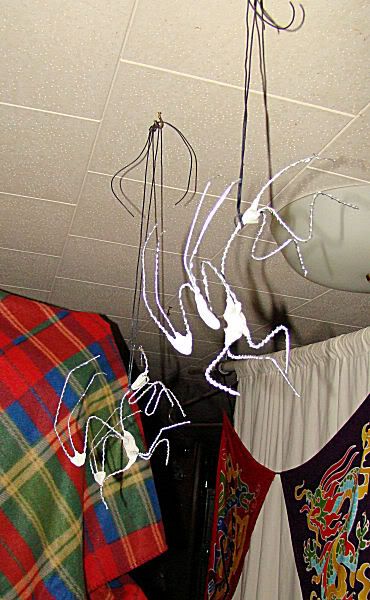
We are experiencing structural difficulties - please stand by...
No, I'm not dumb enough to gratuitously torture dragons, even incomplete dragons. The Mighty Putty I used to secure the various parts of the armatures had a few issues. The only way to fix it was to let them dry without resting any weight on the stressed joints... so I strung them up from the ceiling with old earphone cords, because I didn't trust string not to be cut through by the wrapped wire.
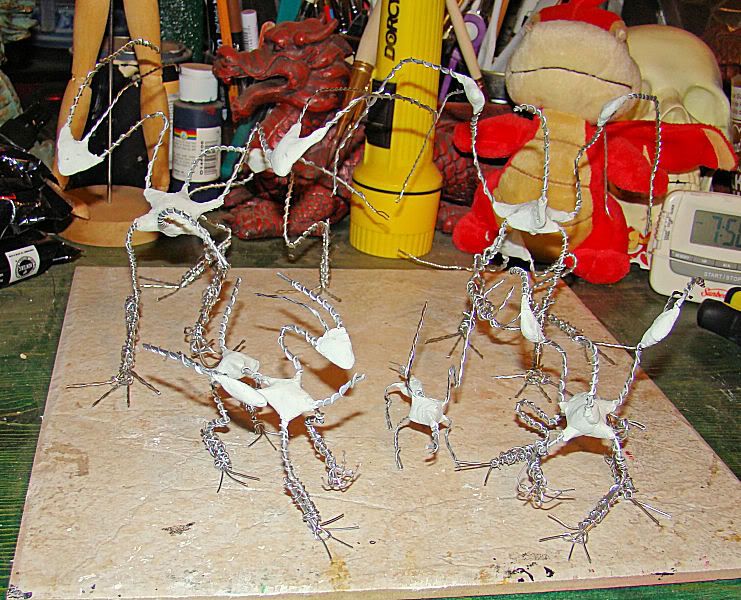
A little closer, but something's missing...
I got the wings fleshed out a bit, and started posing them. But something's not right...
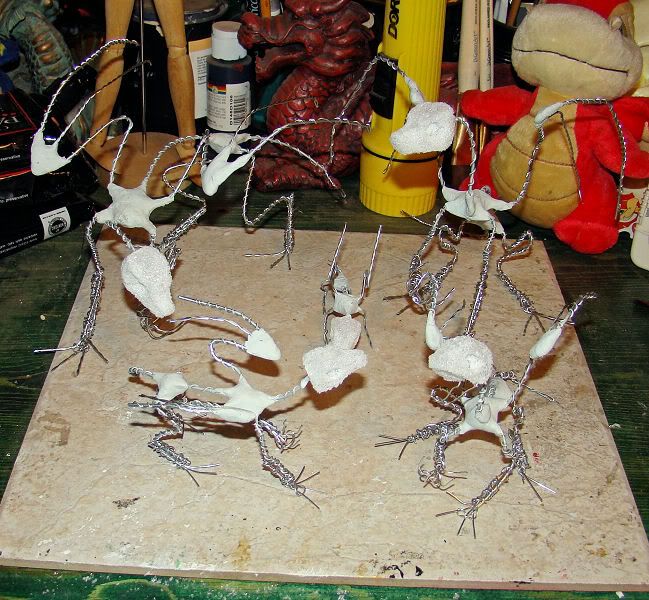
Oh...
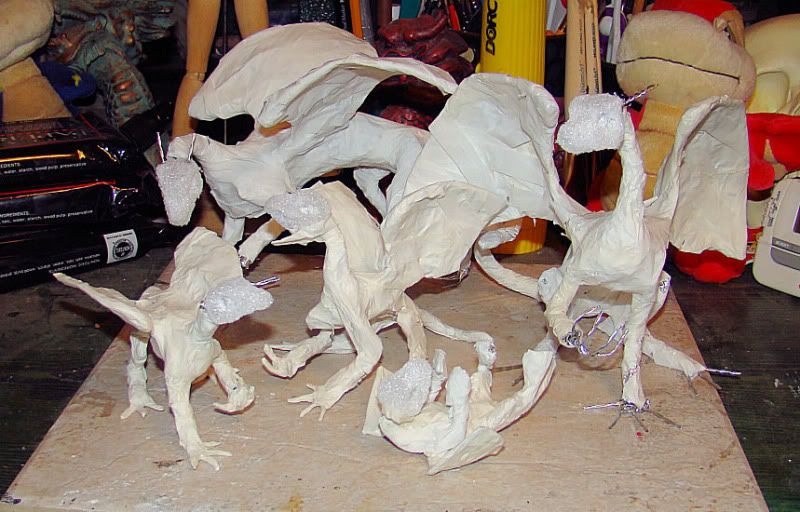
Yeah, dragons do better with heads, you idiot. Gluing on the styrofoam heads wasn't fun, and couldn't be done while I was working too heavily on posing the beasts.
Fleshing Out
One of the more tedious parts of sculpting (at least, the way I do it)... Aluminum foil gives some structure, and florist's tape gives the Paperclay something to stick to. In retrospect, I should've used Activ-Wire for the wings; wrapping them is a serious pain... I've also added the digits at this point, and made more pose refinements.
Eye to Eye
I've started adding Paperclay, and I also stuck the eyeballs in their appropriate sockets. The eyes are just more Paperclay, pre-dried, and are there to give me something to work around as I build up brows and lids and such. The observant may note that I've added some peculiar jaw projections to the two adults. While I was remaking the dragon family, I decided to give Master Dragon a beard (and, though it's not visible, elbow tufts) and Lady Dragon a jaw frill.
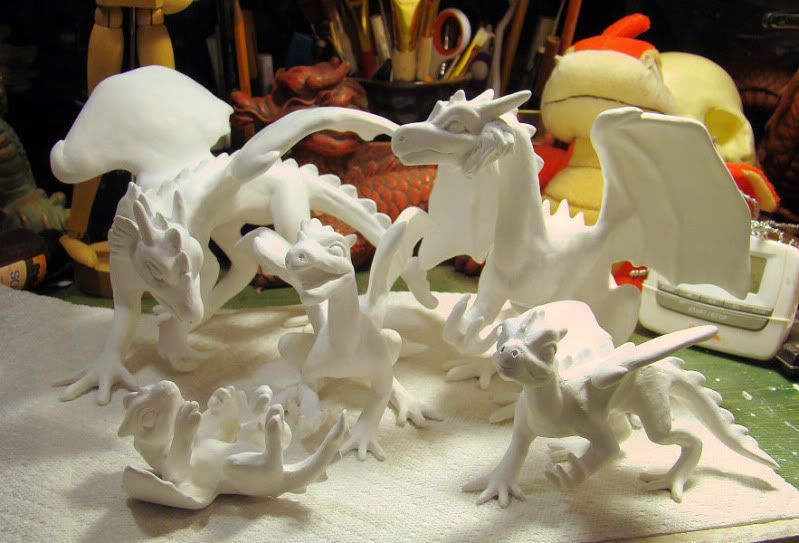
One Miracle Later...
Roughly a month of off-camera work got me here: sculpted and sanded, the dragons are ready for priming and painting. The reason for the long jump between progress photos is that, in the interim, they spent much of their time on their backs and sides and other unphotogenic positions.
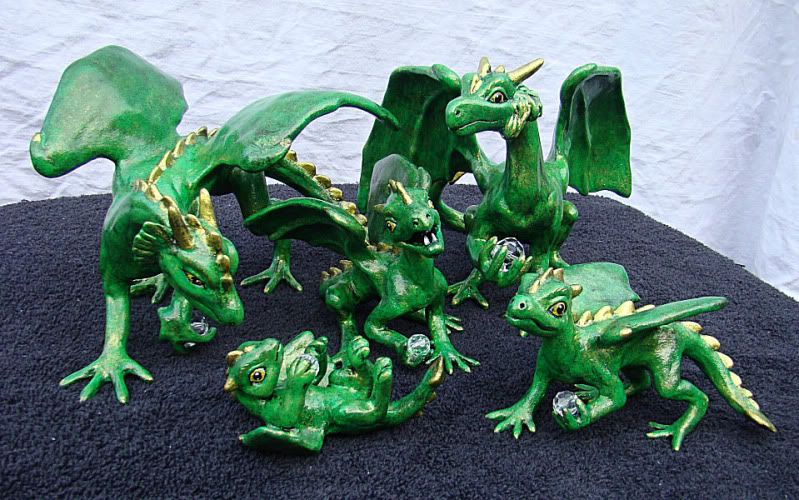
The Final Product
I started with a base of white acrylic gesso, followed by Christmas Green. Or at least, it should've been Christmas Green. Unfortunately, Delta's downgraded their products terribly, so the green I bought refused to cover. My only other paints - Liquitex - didn't come in a green I wanted, and I didn't trust myself to reliably remix a shade I'd be using so much of. So, off to the Home Depot and a sample jar of Behr premium paint + primer (flat interior, Par Four Green.) Worked great*, though I have a ton of Par Four Green left over. It's hard to see, but I've done some spongework and antiquing over the base, in darker greens and metallic gold. I also glued in the crystal beads (and the teeth, in the case of one chatty little dragonling.) After this group photo, the dragons were packed and mailed across country... in the middle of some of the worst winter weather to sock the nation. Fortunately, they arrived at their intended destination.
* - I only recommend this if you watch the person mixing the paint like a hawk; my sister tried using their sample paints for her projects, but she wound up with three bickering twits who not only miscommunicated between themselves, but screwed up her batch so bad it's more like stain than paint.
Anyway, it's been a fairly productive year at the Brightdreamer Workbench. Hopefully, I can carry this uncharactaristic trend through into 2010. Happy Holidays, everyone!

1 comment:
The dragons look awesome!
We did receive the package, thank you very much! G was so excited to see the G - "just like my name!! WOW!"
Post a Comment